
The story behind the picture "The castle of Gripsholm"
The composition

The composition is pretty straightforward. I wanted the castle to be the main subject in the image and I hoped the sunset sky would burst in colour. I framed the castle in a more central position in the image and put the horizon line near the lover third line in order to show more of the sky. In this particular image, I didn't want to blur out the water because it was pretty calm, to begin with, and I liked the reflections from the sky in the water ripples.
In the picture above I have marked where the shooting location was and the left and right endpoints of the panorama. The panorama consists of 7 frames wide each bracketed +1, 0 and -1 stops.
The editing
If the composition was straight forward the editing process were a bit more challenging. There were stitching a panorama, blending a late blue hour single shot of the castle and removing lots of docking buoys. In essence the editing process consisted of the following parts:
Stitching the sunset HDR panorama
Blend a single late blue hour frame with the stitched panorama
Obstacle removal of sensor spots, docking buoys
Finishing of with light and color
Stitching the sunset HDR panorama
In Lightroom this is a fairly straightforward process. There are functions for both HDR blending and panorama stitching. I used both in this case because the images were shot bracketed +1, 0 and -1 stop. In Lightroom, select the images you want to merge and right click on one of the images. In the menu shown, choose photomerge and then HDR. On a PC you can access that menu by clicking "CTRL+H". I only tick the box for auto align and no auto settings. For this particular image i used none or low deghosting because there were not that much movement in the clouds and water.

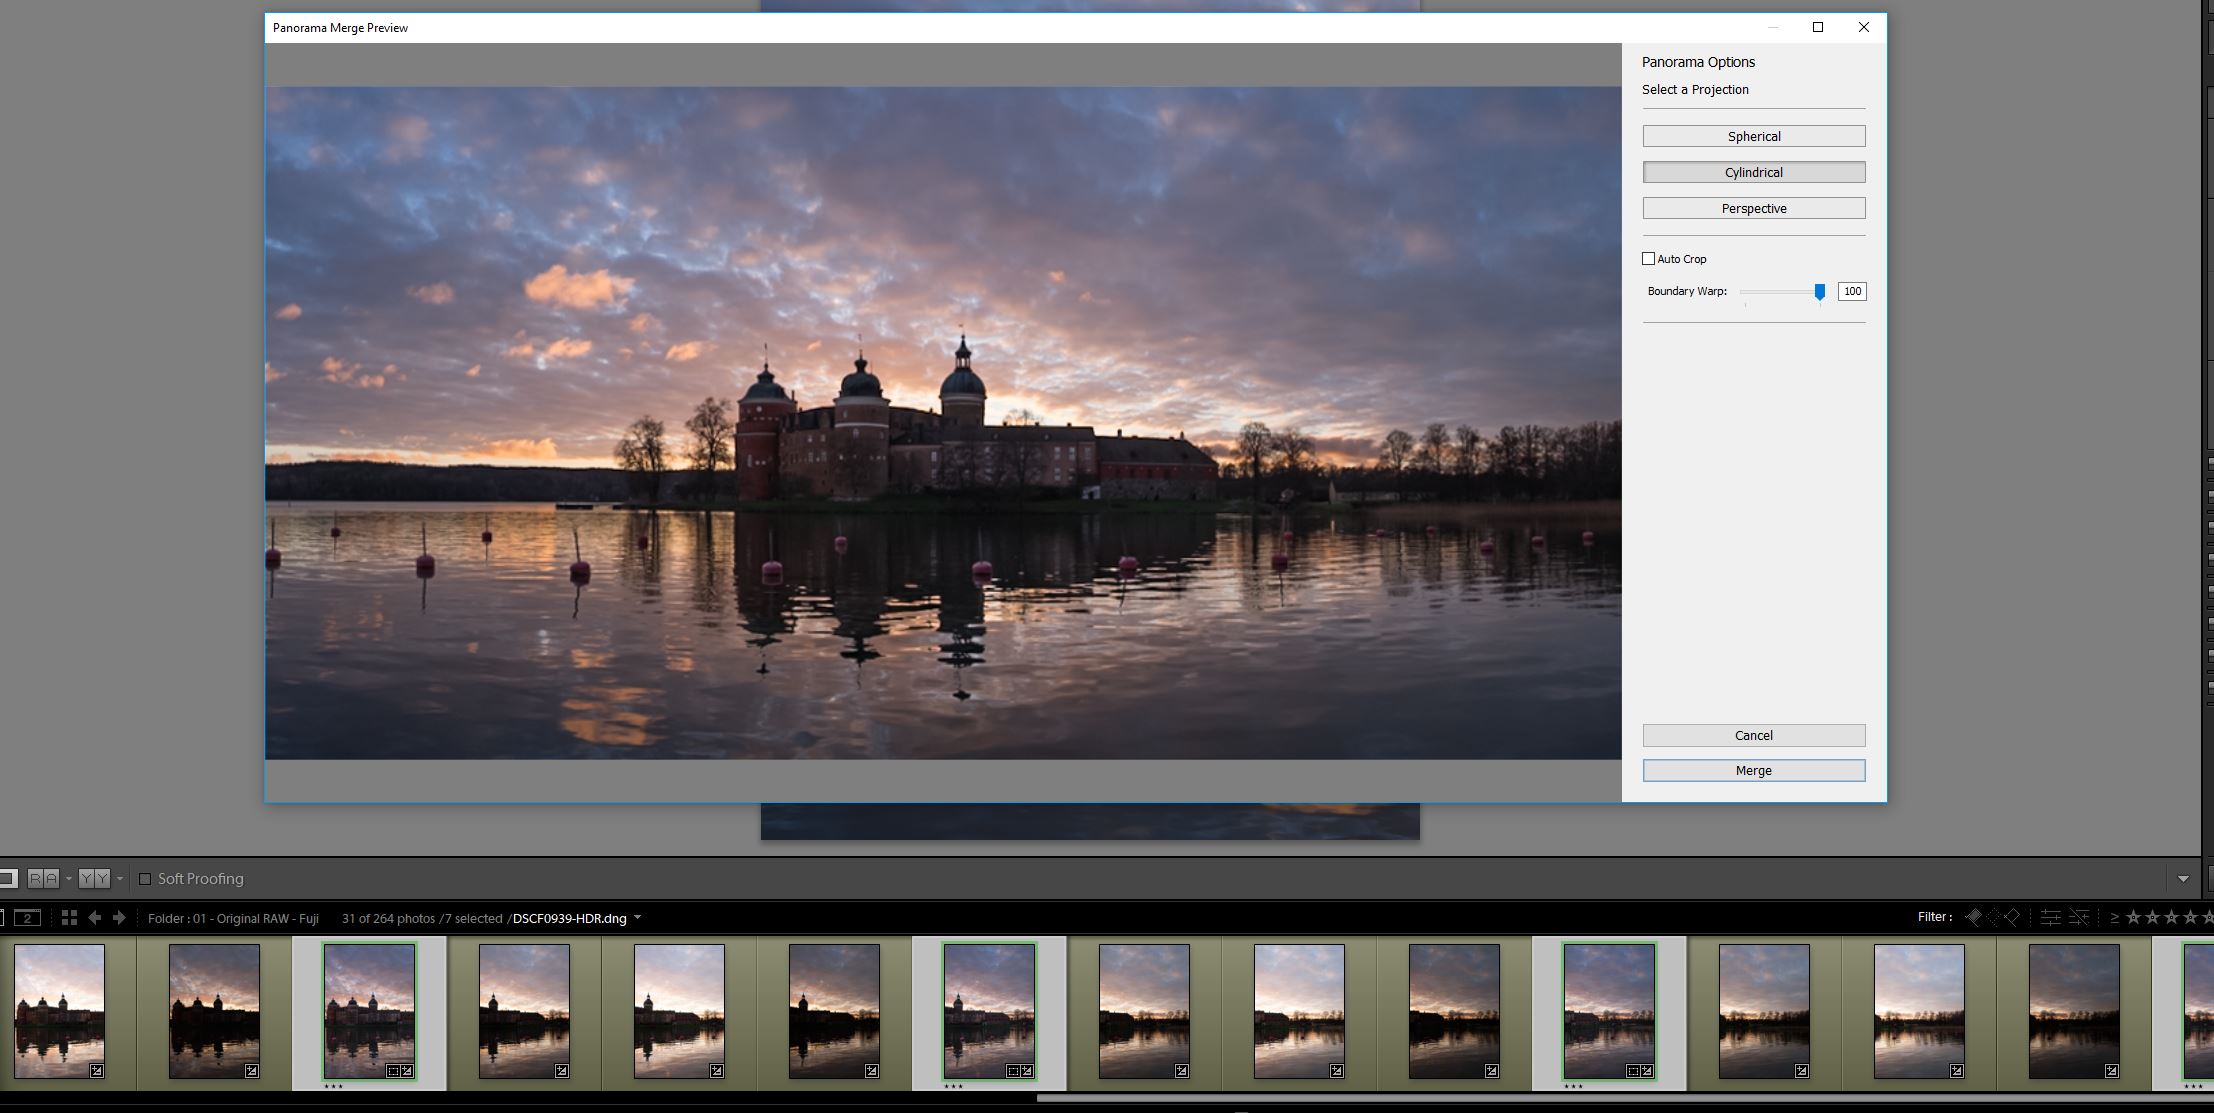
After i had stitched all seven frames it was time to merge the frames in to a panorama image. This will make the image very big and can be a heavy load for the computer to handle. I did a similar process as with the HDR and selected the images I wanted to blend and merged those in to a panorama. Use CTRL + M on a PC or right click on the images you want to merge and choose photomerge panorama to access the panorama tool. For this particular image i thought the cylindrical mode worked the best and i could use 100% boundary warp without the image looking bad.
Blend a single late blue hour frame with the stitched panorama
After finishing up the HDR panorama in Lightroom with some basic adjustments i exported that image in to Photoshop. Now it was time to select and prepare the late blue hour shot i would use for blending the castle. I only made some basic adjustments to the image in Lightroom and exported the image to Photoshop. So far the editing process have been fairly straight forward but now starts the tricky part. Blending a sunset panorama image with a single frame late blue hour shot. The images does not exactly line up that easily.. :D

Lightroom adjustment of the single blue hour shot
In photoshop i started of by figuring out how to align the two images together. I wanted the light from the blue hour shop on the castle to be present on the image but not necessarily the light in the windows from the sunset panorama. Either way i needed to do some masking to blend what I wanted. One way to do it could be to use the lighten blend mode in Photoshop and align the castle so the light end up in the same place but by doing that i end up with window light from the sunset panorama shot. I didn’t think that looked that great so i choose to use normal mode and mask in the image instead.

Blending the blue hour shot with the sunset HDR panorama
Obstacle removal of sensor spots and docking buoys
At this stage the bulk and hard part of the work was done and now it was time to remove and clone out the docking buoys from the image. I also tried to find all sensor spots and small bits and pieces that i thought was "annoying". For this job i used the clone stamp tool and spot removal tool. Depending on what object to remove either of the tool is more useful. So its adapting to the situation that´s the best rout to go.
Finishing of with light and color

The layers in photoshop
At this stage i usually import the image in color efex pro 4 (Nik Collection) and this was no exception. My favorite filters are Pro Contrast, Tonal contrast, Contrast color range, Brilliance/warmth and Classical soft focus. Most often i use Pro contrast and this image was no exception. I don´t believe I added any noise reduction in Photoshop that was done in Lightroom. After I added some overall contrast to the image it was time to sharpen. I used the high pass filter HPF in Photoshop to do the sharpening. An amount of 2,5 was enough in this case.
Now it was time for some color adjustments and luminosity adjustments. I added three masks, Highlights, midtones and shadows so I could adjust selectively what i wanted. I enhanced the blue in the sky above the clouds so it would look more "electric" and also the strengthened the fiery orange in the sky. I wanted the image to be vibrant and colorful. In order to lead the viewer towards the middle of the image I added a slight vignette . The image itself had kind of a natural vignette already so i only deepened the mood a little more.
To finish the image off i strengthened the water reflection of the castle, so it would match the blue hour reflection. I also did some additional spot removal and added a matte effect. And there is the final edit done.
The final image
The castle of Gripsholm - The final edit
I hoped you liked this blog post about the capturing and editing of my image at Gripsholm castle. If you have any questions please let me know in the comments below. If you want me to do more of these please leave a note in the comments below.